Reviving Old Recipes: Carolina Rice and Wheat Bread

I’ve had this obsession with old community cookbooks for a couple of years now, snatching them up whenever I find them at thrift stores, flea markets, etc.  There are two shelves on our big bookcase full of spiral bound journals of recipes from as early as 1933 and as late as 1991.  Honestly, I prefer the older ones.  Starting in around 1960, everything has at least one tin of salmon or tuna and a bucket of mayo in it.

Then I found The Carolina Housewife, which isn’t really a community cookbook.  It was published in 1847 anonymously, but most likely written by Sarah Rutledge.  I found a copy on Amazon, but it was just scanned pages, and almost impossible to read…  but what I read had me hooked.  No easy-to-read list of ingredients and step by step instructions.  Each recipe is a paragraph, full of lots of assumed knowledge (that I don’t have).  I was so fascinated, I found and ordered an old library copy on eBay and have this crazy idea that I’m going to take all the bread recipes, update them with modern ingredients and publish them.

But, I kept putting it off.  The recipes are intimidating.  But, I finally found my first one, Carolina Rice and Wheat Bread.  It took a few attempts, but I think I’ve got it.

The Original Recipe

 Simmer one pound of rice in two quarts of water until it is quite soft; when it is cool enough, mix it well with four pounds of flour, yeast and salt as for other bread; of yeast, four large spoonfuls. Let it rise before the fire. Some of the flour should be reserved to make the loaves. If the rice swell greatly, and requires more water, add as much as you think proper.

The Carolina Housewife by Sarah Rutledge

My Version

I didn’t attempt to make my own yeast for this, and it took a couple of attempts to get to this point.  Since I have no description of the taste, texture or appearance, I just baked them in loaf pans, and well, they turned out fine!  The long ferment in the fridge helps it develop flavor.  My first attempt didn’t really taste like anything.  This one, with the addition of the whole wheat flour and the longer ferment, still has a subtle flavor, but I think it’s really good.  And don’t worry about lumps of rice!  I have no idea HOW, but it all gets absorbed during mixing and kneading.

This recipe should make two large loaves.

Ingredients

  • 1 cup rice
  • 1 quart (4 cups) water (for the rice)
  • 1.5lb all-purpose flour
  • .5lb whole wheat flour
  • 1 cup of water (for the dough)
  • 2 tablespoons active dry or instant yeast
  • 1.5 tablespoons salt

Directions

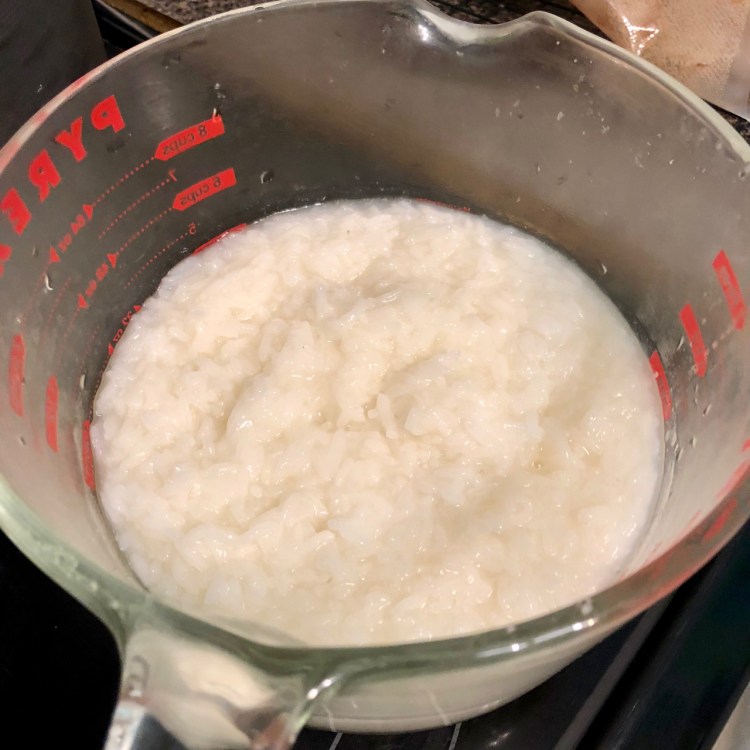
  • The first step is to make the rice.  In a large saucepan, heat the rice, quart of water and a healthy pinch of salt over medium heat.  Once it starts bubbling, turn it down to medium low and simmer uncovered until the rice has absorbed almost all of the water and is really soft and sticky. 
  • Let cool to room temperature, or throw it in a bowl and refrigerate overnight.
  • Add the now-cooled rice to the bowl of your mixer, add the flours, yeast and salt and mix on low with the dough hook until the rice breaks up and the flour starts mixing with it.  Slowly add the water, about a tablespoon at a time until a shaggy sticky dough forms.  Depending on how much of the water is left in the rice you might not need all the water.  It should be just wet enough that all the flour gets absorbed into the dough.
  • Once you’ve got the shaggy sticky dough going on, turn up the mixer to 2 or 3 and knead until the dough gets smoother and pulls away from the side of the bowl, about 5-7 minutes.  It’s still going to be sticky, but hey, that’s the rice!
  • Scrape the dough into a large oiled bowl, cover with plastic wrap or oiled aluminum foil and throw it in the fridge for 36-48 hours.  Check on it a couple times a day and punch it down if it looks like it’s going to jump out of the bowl.
  • Take the dough out of the fridge, cut the dough in half, form into loaves and put them into oiled loaf pans.  Let rise on the counter covered with a towel for 2.5-3.5 hours until they’ve doubled in size and a peeking over the top of the loaf pans.
  • Bake in a 350 degree oven for 40-50 minutes until they reach an internal temperature of 195-200 degrees, then take the out of the oven, remove them carefully from their pans, rub a stick of butter over the top of the crust, and let cool on a rack as long as you can stand it!
This is what my rice looked like after cooking.  It’s… not super appetizing, but it works!
Another view of the final product!

This recipe is still a work in progress.  If you try it, let me know how it goes! 

Southern Pork Ramen Broth

My improvised "Southern Pork Ramen Broth" on the simmer.

I volunteered to make “meat and a lot of it” for the annual Savannah-Chatham Citizen Advocacy Covered Dish Supper, and decided I’d try my hand at smothered pork chops. My plan was to make pork stock, make gravy from it, then sous vide the pork chops (all 35 pounds of them), so I could do most of the prep the weekend before and then just throw it all together. It mostly worked. I could never get the gravy to thicken, I think because of all the fat in it. But, the stock was delicious and I should have just taken it and a bunch of spoons (the pork chops were delicious – sous vide and pork go really well together).

I used a 2 gallon stock pot, so scale this appropriately for the amount of liquid you’re going to use!

So, I’ll skip the gravy part that didn’t work, and instead just share my bonkers “Southern Ramen Broth a la Momofuku” recipe with you.

Ingredients:

  • 1 pound sliced pork belly
  • 1 pound jowl bacon (or bacon if you can’t find jowl bacon – something that’s lightly cured and not full of artificial flavor)
  • 2-3 pounds of country ribs (or shank or shoulder).
  • 3 giant onions (or 3lbs however you want to get there), quartered
  • 3 giant carrots (or 1lb)
  • 6 celery stalks
  • 1 bunch of green onions, with the root end taken off
  • 2 bay leaves
  • 3-5 garlic cloves, smashed
  • Some thyme and rosemary
  • A quarter cup of soy sauce
  • A quarter cup of Worchestire Sauce
  • A bunch of salt (a couple tablespoons probably)
  • A quarter-cup-ish of black peppercorns, just leave ’em whole
  • I also threw in some onions I’d tried caramelizing in my pressure cooker. So, if you have 3 more giant onions and some time, throw ’em in your slow cooker on high for 2 hours and then throw them in the pot too.

And to assemble all this mess:

  • Put your biggest stock pot on the stove on medium heat.
  • Throw in the bacon and pork belly and let it render down some.
  • When it smells amazing, throw in the country ribs and onions, carrots and celery. Mix ’em up until you can smell the onions.
  • Throw in the salt and peppercorns and stir around a little.
  • Pour as much water as will fit in the stock pot.
  • Throw in the soy sauce and worchestire sauce and the herbs and stir a little.
  • Keep it on medium until it starts to bubble along gently, then turn the heat down to medium low.
  • Check on it every 30-45 minutes and give it a stir. There’s no need to skim it. This is ramen broth. It’s supposed to be ugly.
  • Let it bubble away for for 4-6 hours depending on your patience.
  • Taste and add salt or black pepper if it needs it.

After it’s reduced by about a quarter, you can take it off the heat, let it cool for 20-30 minutes, strain it, and then cover and refrigerate for 24 hours (you could eat it right away if you want). I like letting it get all solid and then taking a half to 2/3 of the fat off the top, and reheating just what I need.

If I was going to turn this into a bowl of ramen, I’d make some ramen noodles, a pork chop or two, caramelize some Vidalia onions, get some shredded carrots and thinly sliced green onions in a bowl and then pour the broth over the top.

Another idea would be to get some fresh shrimp, put them in the bowl raw and then pour piping hot broth over the top, which should cook the shrimp (like the beef in pho).

You probably can’t go wrong no matter what you add to it. The broth, especially if you let it go the full 6 hours, can stand up to anything you throw at it.

Another InstantPot Adventure: Taco Fried Rice!

My youngest and I invented a new thing in the Instant Pot last night (if it already exists, OK, but I didn’t know about it): taco fried rice! It was a “throw it all in and see what happens” dish, but here’s the basic recipe:

Ingredients:

  • 1 medium onion, medium dice (a little smaller than a dime, like you’d find in real fried rice)
  • 1 can of corn kernels (I know, stick with me)
  • 1 cup long-grain rice, rinsed (could have used 2, but I was only feeding 2 of us last night)
  • 2 cups chicken stock
  • 1lb ground beef (cubed chicken breast would work too)
  • 2T vegetable oil
  • 1T minced garlic
  • salt
  • cumin
  • chili powder
  • smoked paprika

Directions:

  1. Turn instant pot on sauté while you dice your onion.
  2. Once it’s hot, put in the 2 tablespoons of oil and wait till it’s all shimmery and hot
  3. Throw in the onions and stir ’em around until they’re just starting to brown on the edges
  4. Strain the corn and throw it in too. Seriously, it was good. Stir it around for a minute, just to get it coated with the oil and heat it up a smidge.
  5. Throw in the minced garlic and stir it around a little. You should have the stuff for the next step ready because you don’t want the garlic to burn. 30 seconds, tops.
  6. Shake in some salt, cumin, chili powder and smoked paprika. If I had to guess, there was probably a half a teaspoon of cumin, a teaspoon++ of chili powder and half a teaspoon of smoked paprika. Stir the spices in until the onions and corn are coated and you can really start the smell ’em.
  7. Put the rice in, stir it around until it’s fully coated in everything that starts to look less chalky white.
  8. Pour in the chicken stock, put on the lid, seal it up and hit the Rice button.
  9. While the rice is cooking, brown the ground beef. Spice how you would meat for tacos. If it’s not really lean, you’ll want to strain it before the next step. You’ll want to use your biggest sauté pan for this. You’ll see why in step 11!!
  10. When the rice is done, let it “release” for 5 minutes or so (if I rush it, my rice is always underdone, so I like giving it at least 5 minutes).
  11. Now… scoop the rice into the pan with the beef. Turn the heat up to medium-high-ish. If it’s dry, throw a little of your favorite salsa or picante sauce. Not a lot, maybe a teaspoon or two.
  12. Stir it all around until everything’s mixed and you start to get some rice kernels that are a little crunchy.
  13. Scoop it onto plates, or bowls and enjoy.
    We had it with a little cheese and refried beans on the top, and it was pretty darn good.

Instant Pot Chicken Stock Gone Wild

We got an Instant Pot after Thanksgiving, and it’s probably the single greatest kitchen purchase I’ve ever made. We make dinner in it at least three times a week now.

My latest Instant Pot adventure is an attempt to cure my cold with chicken stock. I took what I liked from the Hainanese Chicken (garlic, ginger and green onions) and combined with with a classic chicken stock recipe (onions, carrots, celery, bay leaves) and ended up with a delicious delicious monster.

This cold doesn’t stand a chance.

Here’s the approximate recipe:

Ingredients

  • 1 small whole roaster, quartered (or you can just throw in some backs and thighs).
  • 2 large onions, quartered, also take the backbone out separately
  • 2 large carrots, sliced
  • 4 celery ribs, sliced
  • 5-6 green onions, chopped
  • 5 cloves of garlic, minced
  • 3″ finger of ginger, sliced
  • 1 tablespoon of salt
  • a bunch of black pepper (6-7 turns of our big grinder or, I don’t know, a dozen whole peppercorns)
  • 4 slices of bacon, chopped (I forgot about that… I had some, so I threw it in)

Directions

  1. Turn your Instant Pot on Saute
  2. Throw in the bacon and stir it around until it’s rendered out a bunch of oil. I also threw in the backbone here to render out some chicken fat just for fun.
  3. Throw in the garlic and ginger and stir until you can really smell them (you don’t want them to burn)
  4. Cancel the saute.
  5. Throw in all the veggies
  6. This is the tricky part… it took a little fiddling to fit all the chicken in, but you can do it! I laid the leg quarters next to each other and then the breast pieces fit in along the sides. You might need to squish the veggies down. Or, it might work better to put the chicken on the bottom and the veggies on top. I don’t know. Do whatever works for you.
  7. Pour in enough water to get to the Max line (but not over, seriously, the Instant Pot gods will be angry)
  8. Put the lid on, seal it up, hit the Soup button and then set the time to 60 minutes.
  9. Let it naturally release (don’t go in and flip the vent thingy as soon as it beeps). That full, it’ll take at least 20 minutes and mine took 40.
  10. Pull out the chicken and then strain everything else through a fine mesh strainer or cheesecloth.

I served mine with just the shredded chicken and some rice noodles. The veggies from the pot were all pretty obliterated and mushy, so I didn’t want them. But, they were tasty, so that’s up to you.

I thought of it more like ramen broth where I’m adding it to pre-cooked noodles, meat and other veggies. And it was tasty, so I don’t think I was wrong.

Enjoy!

Chocolate Covered Strawberry Chess Pie

A close up of the incredible crust on top of the filling of the pie.

I entered a pie contest. It’s my first baking competition and I may have taken it a little too seriously. I spent many weekend days experimenting with different kinds of chess pie, (because the Chocolate Orange Chess Pie was such a hit at Christmas, and chess pie is delicious!). I tried a Mexican Hot Chocolate Chess Pie, which didn’t work, and then came up with the idea of a Chocolate Covered Strawberry Chess Pie and then spent a month trying to come up with a recipe that works.

This is the final product and the recipe that’s going to the competition tomorrow. It’s a lot of steps, but it’s really not that much work, and the end result is totally worth it!

I’m writing this the day before the contest, so I don’t know if it’s an award-winning pie yet, but it’s darn good, so I’m sharing it with you!

This makes two pies (because I had to make two pies for the contest). They’re so good, who doesn’t want two of them?

Ingredients for Pie Crust

  • 2.5 cups of all-purpose flour
  • 2 tablespoons of sugar
  • 1 teaspoon salt
  • 20 tablespoons of unsalted butter, cut into quarter-inch cubes
  • .25 cups ice water
  • .25 cups vodka, chilled (I keep mine in the freezer)

Ingredients for Strawberry Compote

  • 20 ounces stemmed and halved strawberries
  • 2 tablespoons lemon juice
  • 1 teaspoon honey
  • pinch of salt

Ingredients for Pie Filling

  • 3 cups of sugar
  • .5 cup all-purpose flour
  • 6 tablespoons cornmeal
  • 1 teaspoon salt
  • 2 tablespoons of reserved juice from the strawberry compote
  • 6 eggs
  • 1.5 cups of cold buttermilk

Ingredients for Chocolate Layer

  • 2 cups dark chocolate chips (the better the chocolate, the better the pie)

Pie Crust Directions

  • Process 1.5 cups of flour, sugar and salt together in food processor until combined, about 5 seconds.
  • Scatter butter over top and continue to process until incorporated and mixture begins to form uneven clumps with no remaining floury bits, about 15 seconds
  • Scrape down bowl and redistribute dough evenly around processor blade. Sprinkle remaining flour over the top and pulse until mixture has broken up into pieces and is evenly distributed around bowl, 4-6 pulses.
  • Transfer mixture to large bowl. Sprinkle vodka and water over mixture. Stir and press dough together, using stiff rubber spatula until dough sticks together.
  • Divide dough into 2 even pieces. Turn each piece of dough onto sheet of plastic wrap and flatten each into a 4 inch disk. Wrap each tightly in plastic wrap and refrigerate for at least one hour (this would be a good time to make the compote).
  • Before rolling out, let sit on the counter for 10 minutes to soften.
  • When you place the pie dough in the pie pan and trim, leave half an inch outside of the pie pan, and then fold under, then flute. This will help hold in the pie filling when it expands in the oven and make a really yummy crunchy bit of pie crust!

Strawberry Compote Directions

  • Add all ingredients to a large preheated skillet over medium heat.
  • Stir with a wooden spoon every couple of minutes to make sure things aren’t sticking to the bottom.
  • It’s done when you can easily squish the strawberries with the back of a wooden spoon.
  • Before you remove it from the heat, squish all the strawberries so they’re crushed, but don’t obliterate them.
  • Put a wire strainer over a bowl, put the compote in the strainer and drain for at least 30 minutes. You should stir the strawberries in the strainer a couple of times to make sure you get as much liquid out as possible.

Chess Pie Filling Directions

  • Put all the dry ingredients in a bowl (including the sugar) and whisk together to combine.
  • Add all the wet ingredients and whisk until smooth (for me, that’s medium on my mixer with the whisk attachment for about a minute).

Chocolate Directions

  • Put chocolate into a microwave-safe bowl
  • Put bowl in the microwave and microwave in 30 second increments, taking the bowl out of the microwave each time and stirring.
  • Once you can stir the chocolate without leaving chunks, it’s done. If it’s close to done, only microwave it for 10 seconds at a time so you don’t scorch it.

Final Assembly

  • After the crust is in the pan, pour half of the chocolate in the bottom of the pie shell.
  • On top of that, spread half the compote on top of the chocolate.
  • Now, pour half the pie filling on top of that. You want to leave at least a quarter-inch between the top of the filling and the top of the crust as the filling expands while cooking.

Baking Instructions

  • Put pie pan on a cookie sheet (they overflow sometimes) and bake on the top rack for 20 minutes.
  • After 20 minutes, move to the middle rack and bake for 20 more minutes.
  • You may need to add 5-15 minutes to the baking time depending on your oven. The pie is done when you can give it a gentle shake and you only get the tiniest of wobbles in the filling in the very center of the pie.
  • When it’s to that state, take it out and cool on a wire rack for 2 hours before refrigerating.

Acknowledgements

  • Pie crust recipe inspired by Cook’s Illustrated’s The Science of Good Cooking “foolproof double crust pie dough” recipe (I replaced the shortening with more butter).
  • Chess pie filling recipe was based on Callie Spear’s Chess Pie Recipe in Munchies

And here’s a picture of one of the ones going to the contest tomorrow:

A finished chocolate covered strawberry chess pie.

The Simplest Recipe Ever: Sriracha Baked Potatoes

I love Sriracha. I love playing with it because it does really interesting things when it’s cooked. It’s complex and simple at the same time. Unlike a lot of hot sauces, it doesn’t just taste like vinegar and heat – there’s sweetness, smoke and a great chili flavor underneath the (considerable) heat. When you cook it, the heat mellows and the other flavors come out.

It’s the first day back to work after the holidays (I work from home) and the fridge is a little empty and the cupboard a little bare, and everyone else is still off from school, so they’re out shopping and having fun while I’m here in my pajama pants cranking out code.

I decided it was a good day for baked potatoes – but those are boring – and that’s where today’s recipe came from: boredom, scarcity and pajama pants.

Ingredients

  • Russet potatoes (these were pretty small, and I would have preferred Yukon Gold, but this is what I had)
  • Sriracha
  • Whatever you normally put on a baked potato. For me, that’s:
    • Butter
    • Sour cream
    • Salt
    • Pepper
    • and today only, shredded cheddar cheese and some more Sriracha

Directions

  1. Preheat the oven to 375
  2. Wash the potatoes
  3. Poke holes in them with a fork
  4. Squirt a quarter-sized dollop of Sriracha on each potato and rub it all over the potato with your hands.
  5. Put the potatoes in the oven.
  6. Now wash your hands!! You don’t want to get any of that Sriracha in your eyes. It sucks.
  7. Check the potatoes after about 45 minutes. Stick ’em with a fork. If the fork goes in and comes out easily, they’re done.
  8. Take the taters out of the oven, split them in two and adorn them however you see fit. Maybe even with some more Sriracha.

Now eat them! You should notice the skin is better than usual, a little crisper, a little richer in flavor, like the potato that all other potatoes look up to as a surrogate father figure.

This was a lot of words for such a simple recipe.

BBQ That Butt With What You’ve Already Got

A delicious pork shoulder off the smoker.

When I moved to Savannah, I had only ever been a consumer of fine smoked meats (you know, BBQ). I didn’t know the difference between BBQ and “grilling”. I was a poor unfortunate Yankee who didn’t know what he was missing.

Thanks to my own personal BBQ Yoda (the one and only Murray Wilson), I got some education and now smoke my own meats regularly – usually pork shoulder (a “butt”) but I’ve also smoked brisket, chicken, turkey and rabbits.

One of the most daunting things when I was just starting out was that I thought it would be really expensive to get started. Thankfully, I was wrong. Assuming you have even a small gas grill, you can make some delicious BBQ with some experimentation and tweaking (all reversible, of course) of your current equipment!

If you’re going to buy anything, I’d highly recommend a Maverick thermometer. It has a grill temp probe and one for the meat, and it’s the easiest way to keep track of the fire and know when you meat is done that I’ve found (also the best balance between price and performance).

That’s really the only thing you’ll have to buy that’s more than $20. Here’s your parts list:

  • A pork shoulder. The Kroger brand has always worked just fine for me, but you can go as crazy as you want – but when you’re just starting out, I think cheaper is better in case something goes wrong.
  • 10×13 disposable pan. You know, the big aluminum ones you take potato salad to picnics in. If you have a smaller grill, get one that will fit on one side.
  • Two disposable pie pans.
  • Hickory wood chips. Not chunks and not saw dust. You want chips.
  • Cherry wood chips. Again, not chunks and not saw dust. You want chips.
  • Your existing gas grill. You can use a charcoal grill, but I’ve never done that so… umm… find those instructions somewhere else.
  • Olive oil
  • Sriracha
  • Raw sugar (though white will do)

In order to BBQ and not grill your meat, we need the following:

  • Indirect heat
  • Low, constant temperature (“low and slow”)
  • Good smoke

In order to do that, we need to take your existing grill and create a hot side and a meat side. The wood chips and fire will be on the hot side, and the meat on the other.

The Night Before

  • Clean your grill.
  • Make sure you have a full propane tank as it can take up to 1/3 of a tank (or more depending on how well your grill retains heat) for a single BBQ session.
  • If you have lava rocks you use to keep things even, use them. If not, you might want to get some.
  • On one side of your grill (left or right, doesn’t really matter), take the grate off and put the disposable pan right on top of the burner, then replace the grate (the meat will go on top of the grate over the pan so you don’t have pork fat running all over the button of your grill… and there will be a lot of pork fat).
  • In each of your disposable pie pans, put half hickory and half cherry chips in and then cover with water. Put them some place out of the way so they can soak overnight.
  • Go to bed.

In The Morning.

You’ll definitely want to start as early as you can, because they’re not kidding about BBQ being “low and slow”.

Before you put the meat on in the morning:

  • Put one of the pans of wood chips on the hot side on top of the grill grate. You should cover the pie pan with aluminum foil and then poke about 10 smallish holes in the foil to let the smoke out slowly.
  • Set up your grill temperature probe. It should go on the meat side as close to where the meat will go as possible, but with a little space around it.

On to the Meat!

Back in the kitchen, it’s time to get the pork ready for the fire!

  • Take your pork shoulder out its packaging and rinse it with cold water, then pat dry with paper towels.
  • Rub the meat on all sides and in any crevices with olive oil.
  • Wash your hands, and then rub the meat again on all sides with Sriracha. Don’t worry, it won’t be hot once it’s been on the smoke for 10 hours. It helps protect the meat, and adds some lovely flavor.
  • Wash your hands again, and then sprinkle raw sugar over the meat. The sugar will help create the “bark” (the dark crunchy bits on the outside).

2015-05-14 07.10.39-1

On to the Grill!

  • Take your pork out to the grill and put it as far away from the hot side as you can, fat side up.
  • Insert the meat temperature probe in the thickest part of the meat, but make sure it’s not touching the bone.
  • Plug in both probes to the thermometer and turn it on.
  • Light one burner (the one on the farthest side, away from the meat and under the wood chip pan).
  • Close the lid and now comes the fun part!

Watching Things

  • You’ll want to watch the grill temp pretty closely at the beginning. For a gas grill, and for a cooking time less than 24 hours, you’ll want the grill temp to be between 225-250. As soon as you get there, you want to keep it there. If it goes over 250, turn down the burner and see where it settles. This is the most annoying part, but you should be able to dial it in the first hour – and then you only really need to check it every 30-45 minutes while it cooks.
  • Smell the smoke every hour or so. You’ll want to replace the chips with the second pie pan once the smoke starts smelling acrid – which for me takes about 3-4 hours.
  • The meat temperature should climb to 100 degrees (not celsius) fairly quickly, and then for me, looks like it gets “stuck” at 170. That’s fine – that’s where the fat really starts rendering out and the meat gets… awesome.
  • You’ll want to take it off at 190, which can take anywhere from 7-12 hours at 250. It’ll take you a few attempts to really be able to predict how long it will take – and there are a lot of factors that can affect it – wind, outside temp, humidity, etc.

Butts at 160

Once It’s Done

It’s not really done! After you take it off the grill, you’ll want to wrap it in aluminum foil, then old clean towels (that you’ll most likely ruin in this process, but they’ll smell great), and then put the shoulder in a cooler for at least an hour – two is better. I know, it’s hard to be patient.

Once it’s done resting, unwrap it, and then you should be able to “pull” it with two large forks, or with your hands.

Serve with white bread and anything else you want. You can serve it with sauce, but it won’t need it. The meat should be perfect on its own. Really.

I mean, this is worth it, right?

Pork Butt, off the grill.

Chocolate Orange Chess Pie

Finished chocolate orange chess pie, complete with crack on the top.

It’s my first recipe! Hooray! I made my first chess pie, from Callie Spears’ great recipe on Munchies, over Thanksgiving and loved it. It was super easy to make and delicious – my favorite combination!

For Christmas, I decided I needed to do something different with it and thought of the chocolate oranges I got as a kid. And thus was my chocolate orange chess pie born!

This is adapted from Callie Spears’ recipe linked above. Follow her directions for the pie crust – it’s fantastic. It’s fluffy and buttery and perfect with the filling. Just remember that it has to rest for an hour before you roll it out, so include that in your timing.

Ingredients for The Filling

  • 1.5 cups of sugar
  • The zest of half a navel orange
  • 2 tablespoons fresh orange juice (maybe from that navel orange you just zested)
  • .25 cups of AP flour
  • 3 tablespoons of cornmeal
  • 3 tablespoons of unsweetened cocoa powder
  • 3 eggs
  • 1 teaspoon vanilla

Directions

  1. Add all the dry ingredients in a large bowl, whisk to combine.
  2. Add all the wet ingredients to the bowl.
  3. Whisk everything until smooth.
  4. Put that stuff in the pie shell.
  5. Bake at 350 for 40-50 minutes. This took longer than the original to firm up. When you check it, shake the pie a little. If it wobbles a lot, it’s not done and will run when you got it. There should be just the tiniest little wobble in the middle.
  6. Take it out and cool completely on a rack.

It’s really rich, so I like mine with whipped cream on top.

Enjoy!